Garage Spring Cleaning Checklist
Spring has finally sprung, and that means it’s finally warm enough to get some cleaning done outside. First stop? Your garage. As Winnipeg garage door installers, we’ve seen our fair share of cluttered, unsightly garages - and some absolutely pristine-looking ones as well. This checklist and cleaning guide will help you learn how to spruce up your garage just in time for the seasons you’re likely to use it the most often. Garage Cleaning Supplies Checklist You’ll need:
- Work gloves
- Trash bags
- Boxes
- A face mask
- A broom
- A dust pan
- A step stool
- A duster with an extension rod
- Cloths
- A scrub brush (nylon bristle is good)
- A bucket
- All-purpose cleaner
- Liquid soap
- A source of water
- A shop-vac (optional)
- Baking soda (optional)
- Vinegar (optional)
- Degreaser (optional)
- Heavy-duty boots (optional)
- A shop towel (optional)
That’s a lot of equipment, but there’s a good reason for all of it. Garages get dusty, dirty, oily, and all manners of unclean. We need a variety of different tools for the deep clean we’re going to do. Having everything on the checklist might be a bit excessive - but too many tools are better than too few.
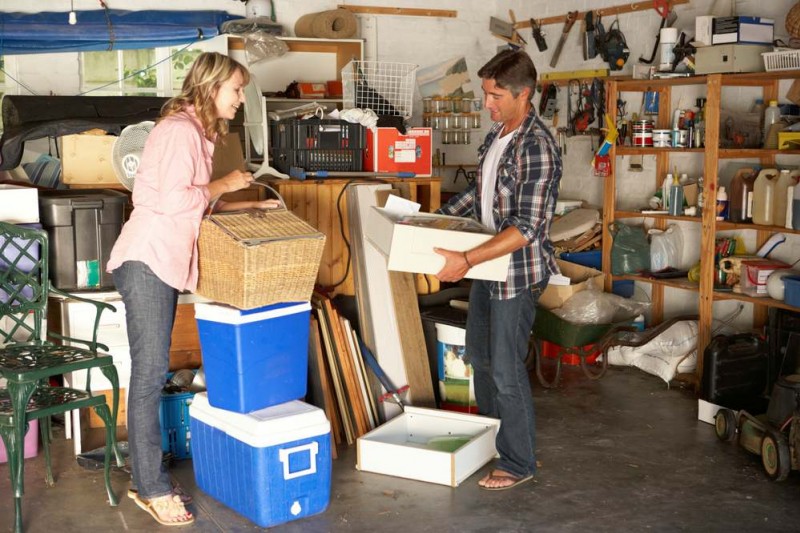
Step 1: Empty Your Garage
We’re going to Marie Kondo this thing, so get ready. You’re going to take everything out of your garage, so the only things left in there are surfaces to clean. That may seem extreme, but trust us - by the end of the cleaning process, you’ll have a tidy, beautiful garage. It’ll be worth the effort.
We recommend using work gloves and heavy-duty boots - there are lots of heavy and sharp objects in a garage, and the more protection you have, the better it’s all going to go. Throw on a mask, too, and you’ll keep dust out of your lungs as you move stuff around.
Everything you want to keep, you’ll put in a box and label. Everything you don’t want to keep, you’ll throw in the trash. Not sure if you want to keep it or not? We weren’t kidding about the Marie Kondo method. See if it sparks joy. Hold it close - if it’s not greasy. If you don’t feel strongly about it, say goodbye and toss it.
Keep in mind that a lot of garage-related waste can’t go in the regular trash. Here in Winnipeg, there are 4R Depots that can accept hazardous waste like paint, paint thinner, batteries, and used oil products. If you’re outside of Winnipeg, check your local regulations!
You’re going to remove everything from your garage and put it nearby - give yourself enough space to walk in and out of the garage. Throw things away and place things in boxes as you go. Once you start hauling stuff back into the garage, take another pass at everything and decide what you really want to keep, what you can donate, and what can be thrown away.
Step 2: Dust & Vacuum
You want to dust before doing anything else. We recommend wearing a face mask for this step.
The best way to dust is to start at the top, then move toward the bottom. Dust falls, so if you start at the bottom and work your way up, you’ll need to dust everything again. This is where the extension handle on your duster will come in handy - the step stool will be useful, too.
We recommend closing your garage door so you can dust that, too. You’ll dust the ceiling, any shelves or other surfaces in your garage, and all of the corners of your garage. Once that’s done, open your garage door again to clean the tracks - turn the door off before doing this. This is a great time to inspect your garage door for any damage or defects!
Once you’ve dusted, you can try to sweep the dust away - but garage dust is quite hard to sweep up. That’s why we recommend using a shop vac if it’s in your budget - you can also shop vac areas that are higher up.
You can use a damp cloth to wipe any areas with stubborn dust. Once you’re done, you can move on to the next step!
Step 3: Clean the Floor
Your garage floor is probably covered in stains - rust and oil stains are incredibly common. Time to get your brush, your bucket full of soapy water, and get scrubbing. Start by treating your oil stains with dish soap - let that stand for 30 minutes to an hour, then add hot water and get scrubbing. Oil stains are tough, and you might need to take a few passes at them. Tired of putting in all that effort? Try using a degreaser - follow the manufacturer’s instructions on how to use it.
Rust stains can be tackled by soaking them with vinegar for about 30 minutes, then scrubbing them away. Like oil and grease stains, rust stains are stubborn, and it may take several passes to get them gone. Some people find a combination of baking soda and vinegar particularly useful for tackling rust stains.
At this point, your garage floor is probably fairly clean - if not a bit saturated with water. You can let it dry, or you can get to work cleaning the rest of your garage.
Step 4: Clean the Rest of Your Garage
Now that your garage has been thoroughly dusted and your floor is clean, you can get to work cleaning the rest of the garage. Your main focus at this point should be the garage door (which you’ve already dusted) and your garage windows.
You can use dish soap and water combined with a non-abrasive sponge in order to clean both your garage door and your garage windows - including any windows on your garage door. Use a mild soap. If you find dish soap isn’t doing the trick, you can instead use an all-purpose cleaner. Be careful, however - you want a very mild cleanser that doesn’t contain ammonia, solvents, or any abrasives.
Once you’ve wiped everything down, you can move on to the next step!
Step 5: Visualize Your New Space
Look at your beautiful garage. Everything is so clean - but all of the stuff that used to take up space in it is sitting outside. Feels a little empty, doesn’t it?
There’s good news - the next step will be to bring everything back inside. But before you do, take a moment to think about where you’ll put it all. Keep things that you frequently use in a place that’s easy to access. Group similar items together. Consider where you could place additional storage, like shelves and pegboards.
Once you know how you want to lay everything out, you can start moving your things back into your garage!
Step 6: Move Your Things Back into Your Garage
This is a great opportunity to take another look at what you might want to throw out and give away. Now that you’ve visualized what your garage will look like, you can group items together. Take the time to label any boxes of stuff that haven’t been labelled, and dust off any particularly dusty items!
Once everything is back in place, all there is left to do is enjoy your new garage. Oh, and your car is waiting for you outside - might as well take it for a spin before parking it in its newly cleaned home.